Interior Trim Panels
This was the most labor-intensive part of the
restoration. The fastback trim panels are made of molded fiberglass and
because of their age, are somewhat fragile. The dilemma facing me
initially was how to remove the black paint while preserving the original paint
underneath. Steel wool and lacquer thinner did the job initially but this
was slow and tedious. And, I was worried about cracking a panel from all
the handling and scrubbing on it. Follow the pictures to learn how I tackled the
problems.
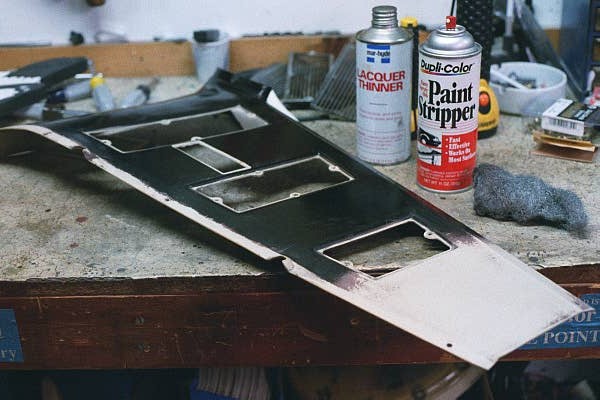
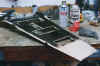
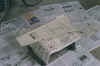
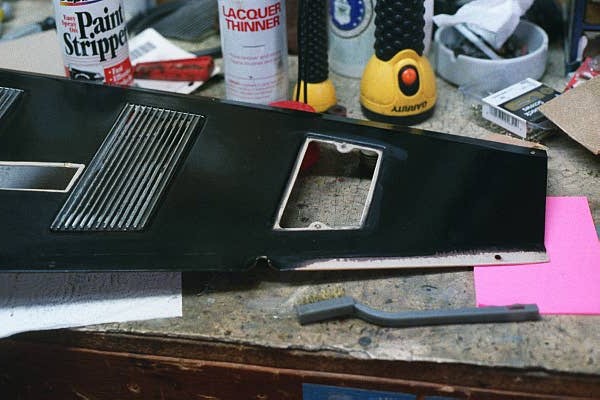
 Right away, I knew the die cast air extractor grilles would have to be removed
if this job was going to be done right and look right. Note that the
previous owner didn't specify this when the black paint was applied! Along
the normally hidden bottom edge of the panel is where I experimented with
DupliColor paint stripper to remove the black. Ever mindful of the horror
stories of stripper and fiberglass, I used it sparingly and let it sit only long
enough to lift the black paint.
Right away, I knew the die cast air extractor grilles would have to be removed
if this job was going to be done right and look right. Note that the
previous owner didn't specify this when the black paint was applied! Along
the normally hidden bottom edge of the panel is where I experimented with
DupliColor paint stripper to remove the black. Ever mindful of the horror
stories of stripper and fiberglass, I used it sparingly and let it sit only long
enough to lift the black paint.
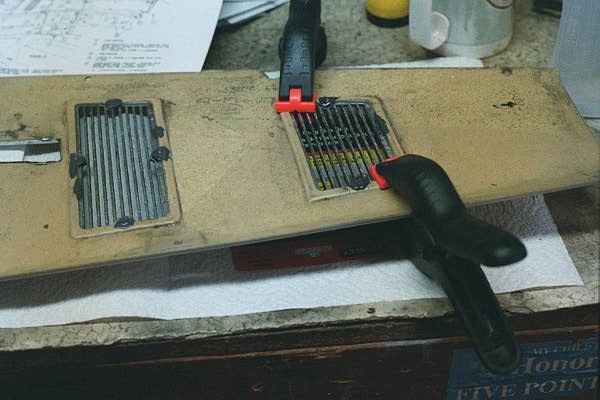
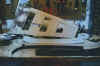
 Achieving success, I removed the remaining grilles and started work on the whole
panel. The grilles were removed by using a dremel-type tool and old
dentist bits to grind away just enough of the inside peened-down stud to free
the grille.
Achieving success, I removed the remaining grilles and started work on the whole
panel. The grilles were removed by using a dremel-type tool and old
dentist bits to grind away just enough of the inside peened-down stud to free
the grille.
 Here's one of the air extractor panels with only a little of old paint to
remove. The painter applied a dark brown primer over these panels before
spraying the black. The original factory parchment paint was as tough as
nails and resisted removal attempts from scrubbing or stripping. Steel
wool was used to feather the edges.
Here's one of the air extractor panels with only a little of old paint to
remove. The painter applied a dark brown primer over these panels before
spraying the black. The original factory parchment paint was as tough as
nails and resisted removal attempts from scrubbing or stripping. Steel
wool was used to feather the edges.
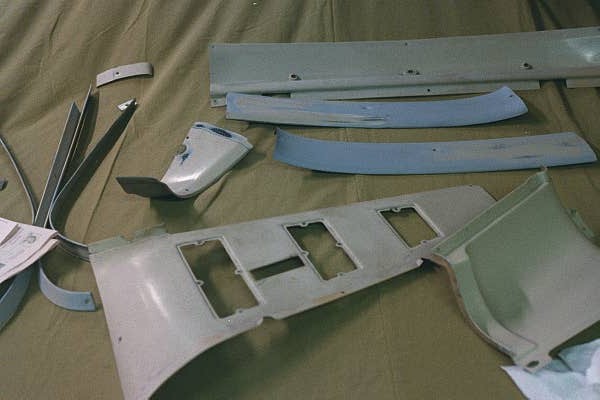
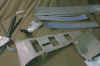 Assorted parts and pieces ready for primer and/or parchment paint. Some of
the "beltline" moulding pieces had corrosion on their inside
faces. They were cleaned up and treated to a light coat of POR15 before
painting.
Assorted parts and pieces ready for primer and/or parchment paint. Some of
the "beltline" moulding pieces had corrosion on their inside
faces. They were cleaned up and treated to a light coat of POR15 before
painting.
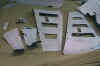 I included this picture to show dissimilarities between right and left side
pieces. The LH extractor panel and RH upper corner trim panel appear to
have a black basecoat on them topped with a gray primer followed by parchment
which was covered by black!.. No explanation for this observation other
than they might not be original to this car.
I included this picture to show dissimilarities between right and left side
pieces. The LH extractor panel and RH upper corner trim panel appear to
have a black basecoat on them topped with a gray primer followed by parchment
which was covered by black!.. No explanation for this observation other
than they might not be original to this car.
 The painting begins. Here the LH extractor panel is wearing a new covering
of parchment. I found that primer was not necessary on smooth fiberglass
panels except for one piece that I used glazing putty on to fill a deep
scratch. Textured panels especially didn't require any primer. Paint
preps consisted of a wipedown with brake cleaner followed by a tack rag.
The painting begins. Here the LH extractor panel is wearing a new covering
of parchment. I found that primer was not necessary on smooth fiberglass
panels except for one piece that I used glazing putty on to fill a deep
scratch. Textured panels especially didn't require any primer. Paint
preps consisted of a wipedown with brake cleaner followed by a tack rag.
 Here's how I refastened the air extractor grilles. Before putting in the
grilles, I carefully ground each pin so that the top of the pin would be
marginally wider than the shank. I then used a titanium epoxy and smeared
a layer around each trimmed pin and the side of the grilles, leaving the pieces
sit overnight.
Here's how I refastened the air extractor grilles. Before putting in the
grilles, I carefully ground each pin so that the top of the pin would be
marginally wider than the shank. I then used a titanium epoxy and smeared
a layer around each trimmed pin and the side of the grilles, leaving the pieces
sit overnight.

The result. Not too shabby!
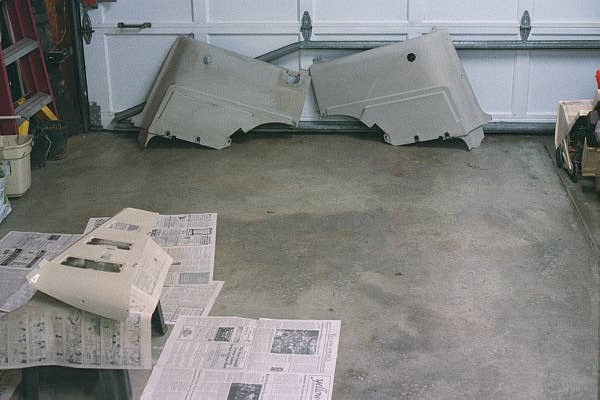
 The large quarter trim panels were a chore to do. Using stripper, the bulk
of black paint was removed with clean up done by lacquer thinner and
brushes. There was no primer to remove. In fact, none of the
textured panels were primered before spraying black. I also found it was
all but impossible to remove the original parchment paint.
The large quarter trim panels were a chore to do. Using stripper, the bulk
of black paint was removed with clean up done by lacquer thinner and
brushes. There was no primer to remove. In fact, none of the
textured panels were primered before spraying black. I also found it was
all but impossible to remove the original parchment paint.
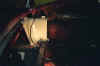
 Courtesy lights were removed, cleaned, and lenses replaced. The black
accent ring was also repainted. These panels are ready for installation!
Courtesy lights were removed, cleaned, and lenses replaced. The black
accent ring was also repainted. These panels are ready for installation!
Reassembly
 Let the fun begin. First to go back in are the lower corner trim
pieces. These are retained by two rivets (three once the center section is
installed). I also added additional securing screws which the factory
didn't include.
Let the fun begin. First to go back in are the lower corner trim
pieces. These are retained by two rivets (three once the center section is
installed). I also added additional securing screws which the factory
didn't include.
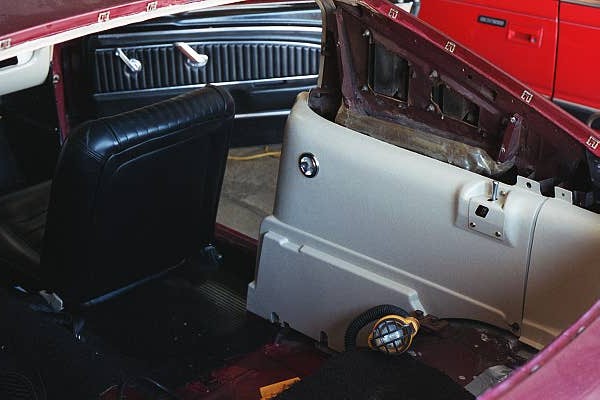
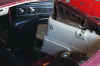 Next are the large forward quarter trim panels with the courtesy lights.
Before installing the RH panel, I attached the seat back latch cover using new
screws, washers, and speed nuts. These proved a tad difficult to install
because the bracket welded to the inner wheelhouse wasn't placed properly and
the factory had used lag screws instead of the correct bolts.
Next are the large forward quarter trim panels with the courtesy lights.
Before installing the RH panel, I attached the seat back latch cover using new
screws, washers, and speed nuts. These proved a tad difficult to install
because the bracket welded to the inner wheelhouse wasn't placed properly and
the factory had used lag screws instead of the correct bolts.
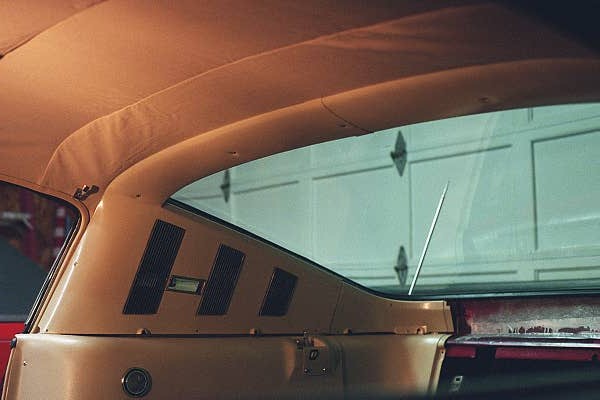
 Gettin' there. After the glass was put in, the air extractor sliding valve
and the upper trim pieces were installed. This process took the most time
because all the panel supports had been removed for glass installation and now
had to be realinged to the panel screw holes.
Gettin' there. After the glass was put in, the air extractor sliding valve
and the upper trim pieces were installed. This process took the most time
because all the panel supports had been removed for glass installation and now
had to be realinged to the panel screw holes.

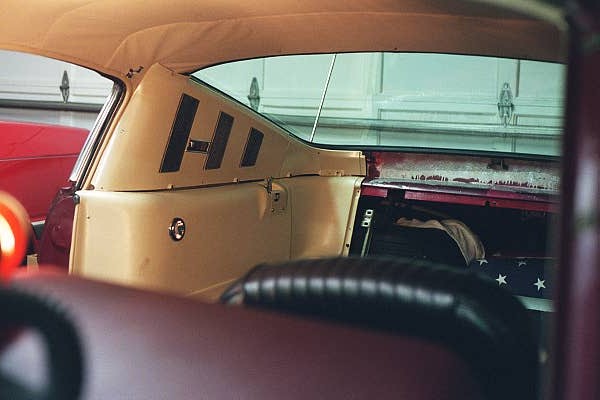
Looking at the LH side before the air extractor trim panel is fastened in
place.
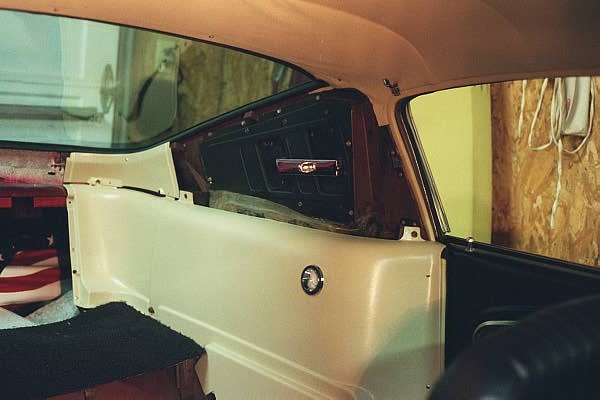
 After both extractor panels were in, the large metal upper garnish trim pieces
were installed. Here's where it paid off to have screws installed before
the headliner was put in. To find the screw holes, all you have to do is
feel for the screw head, cut a small hole and push the headliner down over the
screw head, remove the screw, and you're all set to properly faster your
finished trim!
After both extractor panels were in, the large metal upper garnish trim pieces
were installed. Here's where it paid off to have screws installed before
the headliner was put in. To find the screw holes, all you have to do is
feel for the screw head, cut a small hole and push the headliner down over the
screw head, remove the screw, and you're all set to properly faster your
finished trim!
 The center trim section is retained by three rivets and three screws. The
two end rivets also go through the lower corner trim panels so make sure you use
long rivets. 3/16" is the diameter for the rivets. This was the
only trim panel that had a break in it which I was able to repair, but failed to
document for this page. Trapdoor hinges are also installed. BTW, the
hinges are painted the color as the door.
The center trim section is retained by three rivets and three screws. The
two end rivets also go through the lower corner trim panels so make sure you use
long rivets. 3/16" is the diameter for the rivets. This was the
only trim panel that had a break in it which I was able to repair, but failed to
document for this page. Trapdoor hinges are also installed. BTW, the
hinges are painted the color as the door.
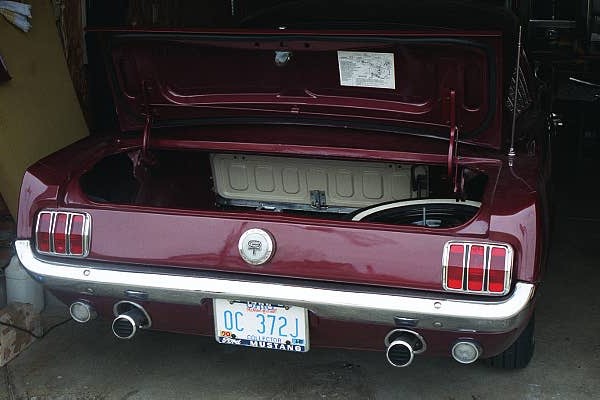
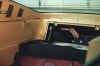
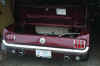 With the trapdoor installed, here's what the view from the trunk should look
like. The entire trapdoor, inside and out, is painted the predominant
interior. So in my case, the trunk side of the door, like the engine
compartment part of the steering column tube, is also parchment.
With the trapdoor installed, here's what the view from the trunk should look
like. The entire trapdoor, inside and out, is painted the predominant
interior. So in my case, the trunk side of the door, like the engine
compartment part of the steering column tube, is also parchment.
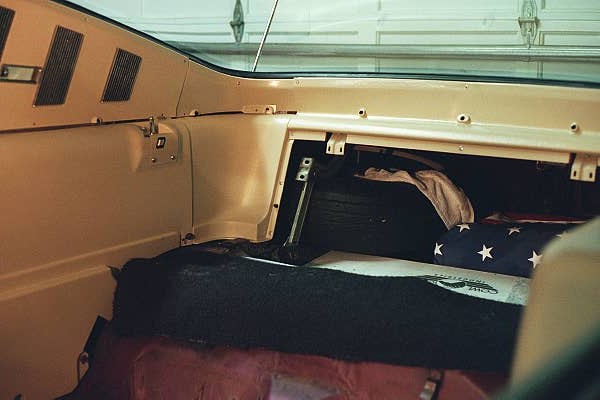
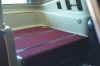 TA-DA !!! This is what a correct 1966 D3 and F3 fastback interior
looks like. Ignore the just visible corner of the black front seat.
Weren't enough funds to do everything at once.
TA-DA !!! This is what a correct 1966 D3 and F3 fastback interior
looks like. Ignore the just visible corner of the black front seat.
Weren't enough funds to do everything at once.
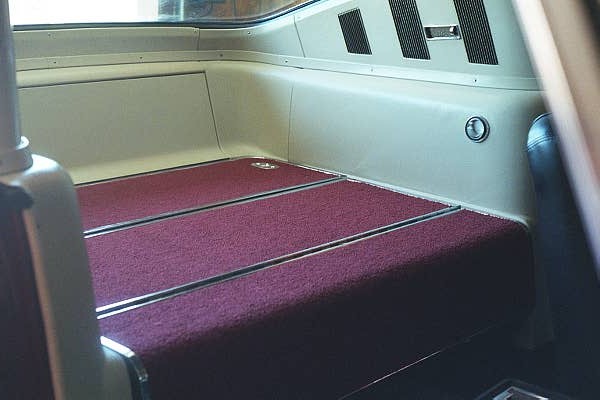
Left to do are the seats, kick panels, carpet, doors, and door
panels. The expensive stuff.
Return to Restoration
Area page
 Right away, I knew the die cast air extractor grilles would have to be removed
if this job was going to be done right and look right. Note that the
previous owner didn't specify this when the black paint was applied! Along
the normally hidden bottom edge of the panel is where I experimented with
DupliColor paint stripper to remove the black. Ever mindful of the horror
stories of stripper and fiberglass, I used it sparingly and let it sit only long
enough to lift the black paint.
Right away, I knew the die cast air extractor grilles would have to be removed
if this job was going to be done right and look right. Note that the
previous owner didn't specify this when the black paint was applied! Along
the normally hidden bottom edge of the panel is where I experimented with
DupliColor paint stripper to remove the black. Ever mindful of the horror
stories of stripper and fiberglass, I used it sparingly and let it sit only long
enough to lift the black paint.