DASH and Instrument Panel
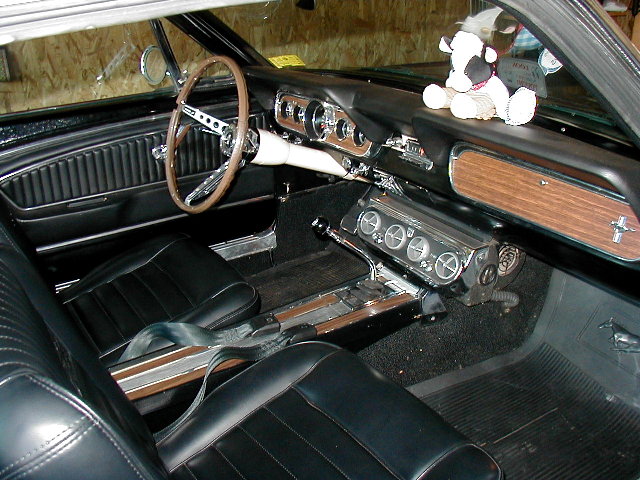
This is what it looked like upon start of the restoration process. The little cow is about to lose it's perch. The steering column was already restored during a previous process (see "Steering Column", left) so it was simply removed and stored for the duration.
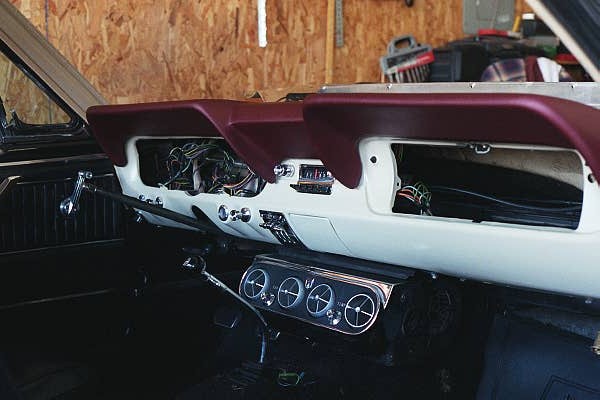
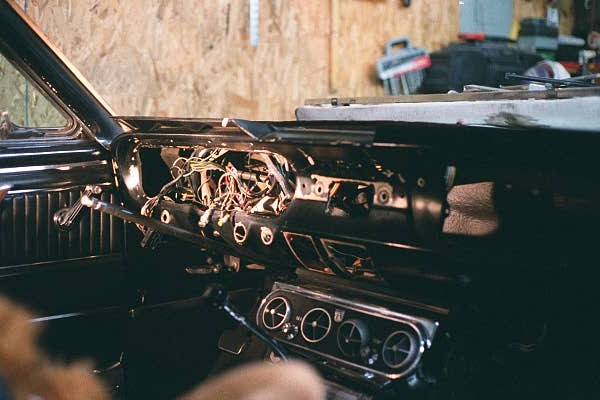 First order of business was to gut the dash of everything but the wiring
harnesses. The A/C evaporator was removed shortly after this picture was
taken. Note the parchment color showing around switch holes and other
openings, indicating that whoever painted the interior black simply masked
around switches, radio bezel, etc.
First order of business was to gut the dash of everything but the wiring
harnesses. The A/C evaporator was removed shortly after this picture was
taken. Note the parchment color showing around switch holes and other
openings, indicating that whoever painted the interior black simply masked
around switches, radio bezel, etc.
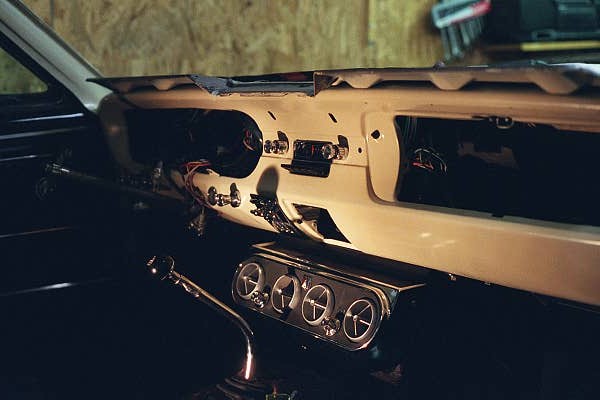
 Started paint removal on the LH side of the dash and A-pillar. The black
paint had been simply sprayed over the factory original parchment. In this
picture, the windshield has already been removed. Note the parchment
around the hole for the fog light switch.
Started paint removal on the LH side of the dash and A-pillar. The black
paint had been simply sprayed over the factory original parchment. In this
picture, the windshield has already been removed. Note the parchment
around the hole for the fog light switch.
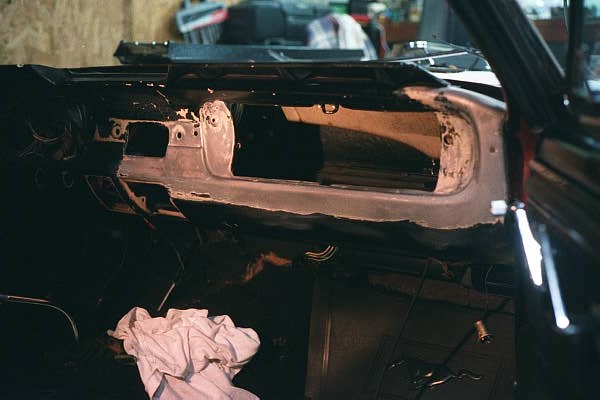 Paint removed on the RH side. Rather than trying to save the original basecoat,
the dash was stripped to bare metal, thereby removing any possibility of
contamination from the black paint or primer. The stripping process consisted of
brushing on the stripper in small manageable areas, letting it sit for about
five minutes, then scrapping it off with a plastic squeegee.
Paint removed on the RH side. Rather than trying to save the original basecoat,
the dash was stripped to bare metal, thereby removing any possibility of
contamination from the black paint or primer. The stripping process consisted of
brushing on the stripper in small manageable areas, letting it sit for about
five minutes, then scrapping it off with a plastic squeegee.
 Following the stripper, lacquer thinner and #00 steel wool were used to remove
the last of paint and primer, as well as any minor surface rust. In this
photo, only a small amount of the original parchment remains. Preps for
painting then commenced with a prewash of lacquer thinner, masking of the dash,
followed by a wipedown with brake parts cleaner and a tack rag. Once it
was all checked and declared clean, a coat of light gray lacquer primer was
applied.
Following the stripper, lacquer thinner and #00 steel wool were used to remove
the last of paint and primer, as well as any minor surface rust. In this
photo, only a small amount of the original parchment remains. Preps for
painting then commenced with a prewash of lacquer thinner, masking of the dash,
followed by a wipedown with brake parts cleaner and a tack rag. Once it
was all checked and declared clean, a coat of light gray lacquer primer was
applied.
 I gave the primer about 30 minutes to dry after which I checked for any surface anomalies
and masking flaws. After a wipedown with Prep-All and a tack rag, I shot
the parchment using spray can lacquer paint from National Parts Depot. I
sprayed about three coats allowing a minute between coats for the paint to
flash. It took just over a half of a can to paint the dash and
A-pillars. After 45 minutes, I removed the masking, cleaned the area, and
quit for the day!
I gave the primer about 30 minutes to dry after which I checked for any surface anomalies
and masking flaws. After a wipedown with Prep-All and a tack rag, I shot
the parchment using spray can lacquer paint from National Parts Depot. I
sprayed about three coats allowing a minute between coats for the paint to
flash. It took just over a half of a can to paint the dash and
A-pillars. After 45 minutes, I removed the masking, cleaned the area, and
quit for the day!
Reassembly - I thought out this process very carefully regarding what goes in first, what's next, etc. It's tempting to jump ahead because you're excited about what it will look like with certain items installed. Worst thing is having to remove something you so hastily installed. The potential for damage is great! Patience here pays big dividends later on.
 Reassembly commenced with installation the switches, the cleaned-up heater
control assembly, radio, and the A/C evaporator. I refurbished each
assembly as best I could before installation. Since the A/C was void of
freon, I also removed the hoses and flushed out the system using brake parts
cleaner and compressed air.
Reassembly commenced with installation the switches, the cleaned-up heater
control assembly, radio, and the A/C evaporator. I refurbished each
assembly as best I could before installation. Since the A/C was void of
freon, I also removed the hoses and flushed out the system using brake parts
cleaner and compressed air.
 Continuing, ashtray, windlace, and dashpad are installed. The maroon
dashpad, a repro piece, was very well constructed in all areas except where the
defroster ducts and the radio speaker go. Compared to the picture above,
the dash appears white - the effect coming from outside light versus a halogen
light bulb.
Continuing, ashtray, windlace, and dashpad are installed. The maroon
dashpad, a repro piece, was very well constructed in all areas except where the
defroster ducts and the radio speaker go. Compared to the picture above,
the dash appears white - the effect coming from outside light versus a halogen
light bulb.
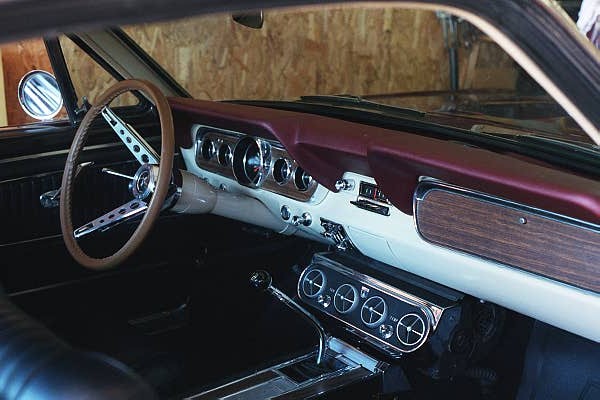 Almost done! The glove compartment, instrument cluster, and steering
column have all been reinstalled. Also installed is the windshield,
rearview mirror, sun visors (not visible), and console.
Almost done! The glove compartment, instrument cluster, and steering
column have all been reinstalled. Also installed is the windshield,
rearview mirror, sun visors (not visible), and console.
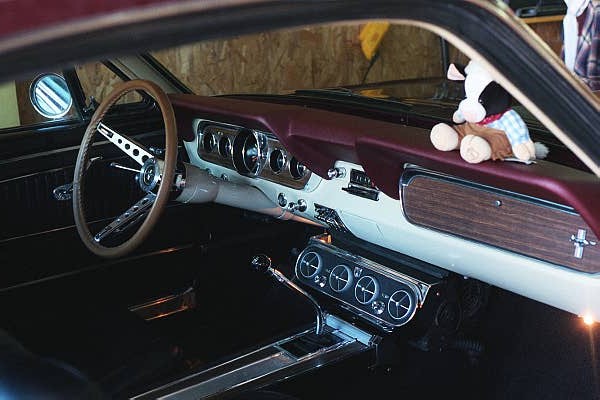 COMPLETED! The lower windshield moulding is the final piece installed
after the radio speaker and speaker grille. The battery was reconnected
and the little cow is back on it's perch.
COMPLETED! The lower windshield moulding is the final piece installed
after the radio speaker and speaker grille. The battery was reconnected
and the little cow is back on it's perch.
Kick panels, door panels, carpet (excluding folddown carpet), and seats were not changed. They will remain black until time and funds become available in the future.
Return to restoration area page